Monday, December 29, 2014

More 3D Printed Gifts


Files from left to right:
All were smoothed and spray or hand painted. The star had paper decoupage. The paper fins were laser cut from the wrong projection but that worked as a reasonable enough approximation. I'm still trying to figure out which the proper projection would be exactly.

Minion:


Tree frog, looking really glossy!


Gyroid, file available here: http://www.thingiverse.com/thing:589489
Read more here: http://en.wikipedia.org/wiki/Gyroid


Star Vase


Sunday, December 28, 2014

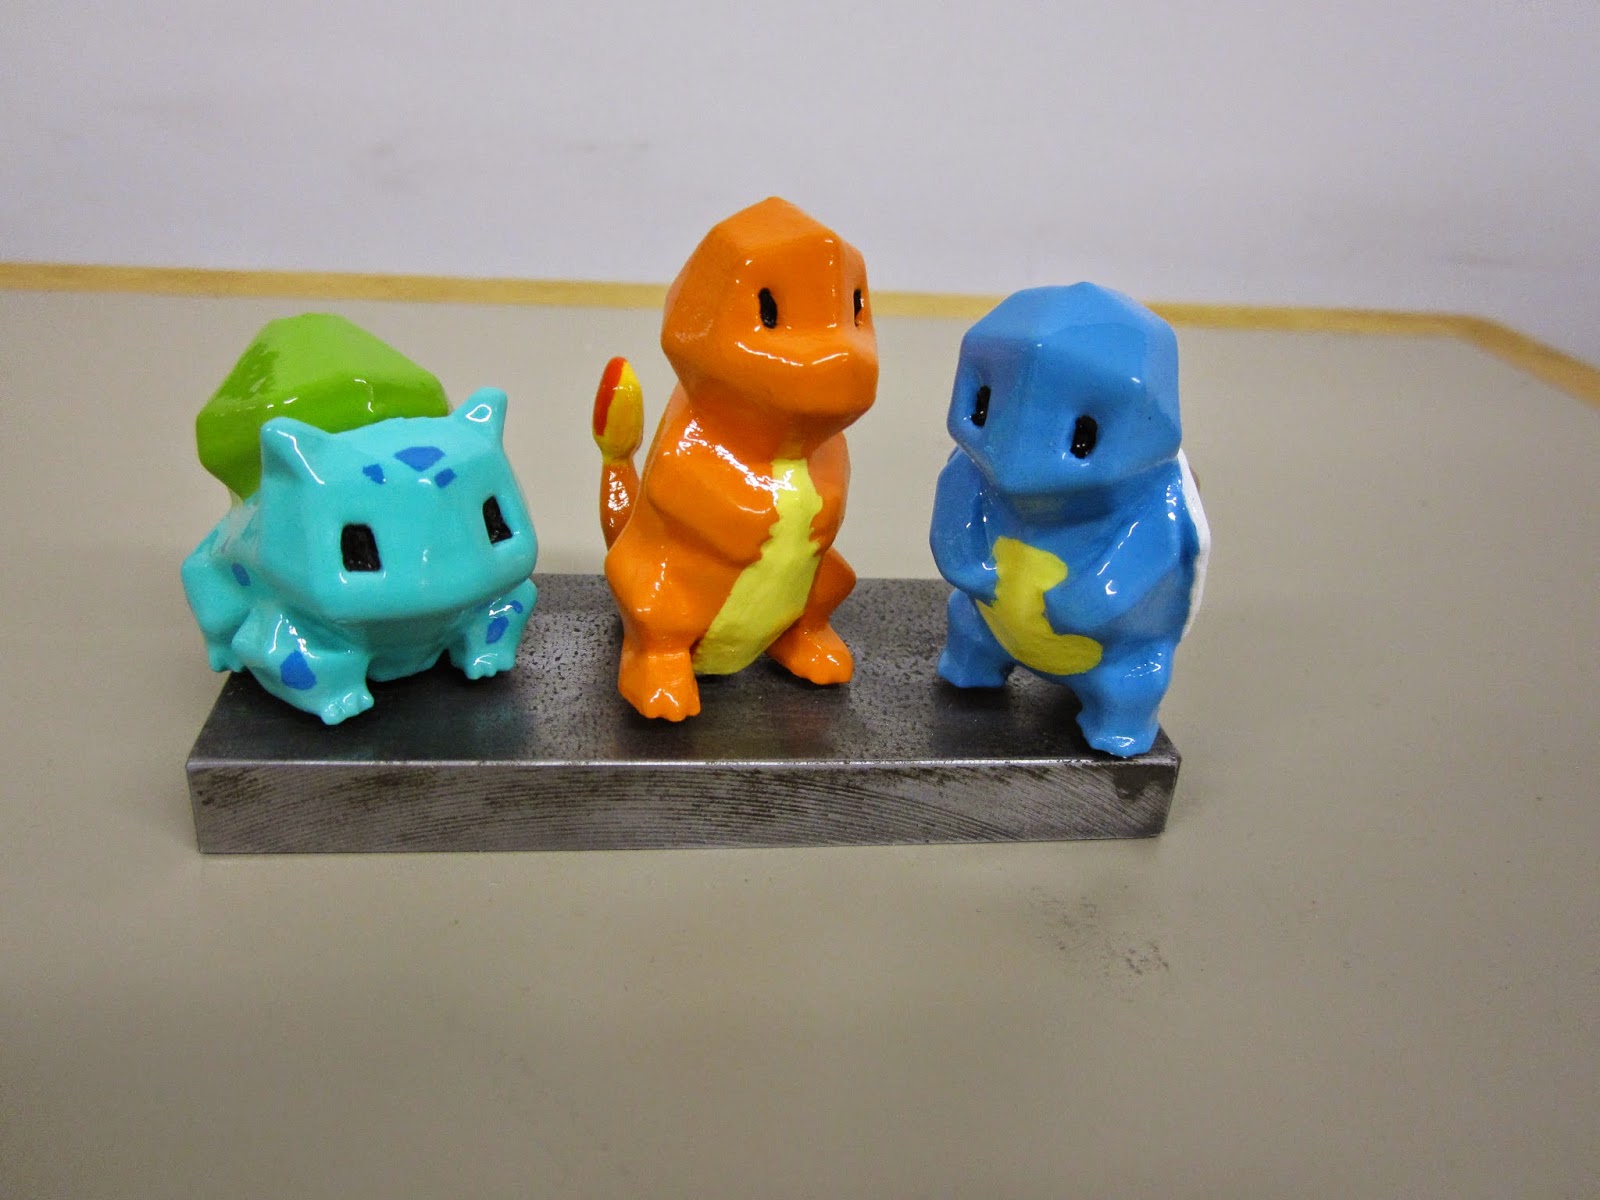
Low-Poly Pokemon


I 3d printed these for my sister. The designs are by FLOWALISTIK through Thingiverse.

After printing, they were smoothed in an acetone vapor bath. Then primed with flat white primer, then hand painted with acrylics. Finally, glossed with Triple Thick Clear Glaze spray.

I put magnets on the bottom and found a piece of steel to serve as a base.

Friday, December 26, 2014

MOARbots Bumper cars


I didn't quite get around to finishing the setup for four of the bot pictured above plus code. I had planned to get them done before I left town but holiday gift season got in the way of that. I ran into some issues at 4 AM and then realized it is 4AM and I have not a lot of time left before I have to be packed and headed to the airport. Until 'next year' then.

Wednesday, December 24, 2014

Chocolate Mold Round 3

The syringes arrived so I gave the chocolate mold project another try. I also tried to do the cold water bath thing for tempering the chocolate. It didn't work.


Ideally I'd have a temperature controlled multi-color extrusion machine setup where I just put the molds under it and it precisely fills them. For now I'm taking a break from chocolate though.

Sunday, December 21, 2014

Chocolate Mold Round 2

I bought a sheet of HDPE plastic (note: they are called sheets, not blocks, even though this 'sheet' is 1 inch thick) and milled out a bunch more mold positives.


Then I cast them with Smooth-Sil 940:


And then I spent all of this morning making a huge mess in my kitchen and burning myself repeatedly. Here are some very messy first tries:


Verdict: Pouring chocolate is a real pain.

What didn't work::
  • Screw-top plastic squeeze bottles
    • Plastic becomes softer when warm, tip clogs, then applying pressure just causes the cap to explode off the bottle
  • White Ghiradelli chips burn before they melt. Cherry chips burn before they melt. Old candy melts burn before they melt.
  • Ziploc piping bag
    • You have to keep readjusting your grip as the bag empties--not enough fine control
  • Improvised double boiler--didn't get as hot as I wanted and chocolate ended up solidifying in the wrong way (basically it only hardens in the fridge/freezer and it is too soft and pliable)
  • Spoon -- not enough fine control
  • Thick and tall mold walls--I didn't think about this, but the thicker and taller mold walls make it harder to release the chocolates without breakage. This means having to pour the chocolate fairly thick to make it strong enough to survive release.
    • I can cut down the existing molds with a knife fairly easily
    • I can get a new block of HDPE and mill everything again ($24 and a few hours sitting in front of the CNC)

What did work:
  • Microwave method. Much cleaner, less moisture, you can reheat whenever.
  • Syringes (oral syringes, plastic kind).
    • The trick is to empty them then pump a few times between uses, to avoid having the tip clog. If there is a big enough hole left in the tip to allow suction of the liquid chocolate, then the hardened chocolate in the tube will be melted by the newly suctioned chocolate.
  • Actual chocolate, and candy melts that aren't very old. These melt fine in the microwave.
  • Tapping/dropping the mold repeatedly
    • Rather than trying to put the chocolate in an even layer, it is possible to just put some in the center then repeatedly shake/drop the mold onto the countertop until it settles in a flat layer

What might help make the process better:

  • Gloves, to avoid leaving melty fingerprints on the chocolate when demolding
  • Better quality chocolate
  • A brush or a toothpick for cleaning up details in the first pour
  • A temperature controlled rig for keeping the chocolate ready for pouring (expensive, but probably very helpful)
  • A candy thermometer for checking the temperature
  • Cocoa butter/veggie oil/butter/coconut oil for the syringe (should make it a lot easier to pull the chocolate into the syringe)

So what's next? I was only able to obtain one syringe in stores today, so I went online and ordered a bunch more in various shapes and sizes. I've spent a lot of money on this project so far but I'd rather learn to do things right than to just get some mediocre results out cheaply and quickly. And I guess that reveals that the whole point of this project--not to create cool looking chocolates, but rather to learn about mold making.

Thursday, December 18, 2014

SD Card Fixing - Precision Fit

Yesterday one of my trusty old SD cards broke in a really simple way. The lock tab fell off. I immediately assumed the lock tab was some kind of tiny switch that jumpers tabs on the SD card, so I peeled away the plastic shell to look inside.

Turns out the SD card write lock mechanism is on the readers, not the SD card. Fixing the lock mechanism (or rather, permanently setting the card to write allowed) is as simple as putting something in/over the lock to hit the switch on the reader.

I superglued the card back together with an additional tiny piece of plastic and tested it and it worked, with one caveat. The push-inward-to-eject feature in my camera's SD card slot wasn't working, presumably because the card was too thick. This meant that to take it out, I had to remove the camera battery, then carefully pry it out (there isn't much room so it is tricky). Not happy to leave things half done, I sanded it down until it fit.

Of course now neither my cheap SD card USB reader, nor my camera, could read the card. The push to eject feature worked smoothly, but that was no help for a card that wasn't recognized.

So now I shimmed the card with a piece of cardstock, and the USB reader read it fine. Now I tried it on the camera. It was not read by the camera, nor did the push to eject feature work smoothly anymore. Darn.

Still not content, I reinspected the card, and discovered that the most likely culprit of the push to eject failure was actually the replacement lock. There's a groove in the side of the card and my replacement piece of plastic for the lock tab interrupted that. This is what was catching and preventing the mechanism from working. So I tried to clean up my work with an x-acto knife. Results: Still not clean enough for the push to eject mechanism, and now the USB reader thinks the card is locked again (the tab isn't hitting the lever anymore since I removed some material).

Okay moral of the story: 'the enemy of good is better' and more importantly, 'SD cards need to be very precisely the right shape to work in many readers.'

Wednesday, December 17, 2014

Painting Suggestions #1

I've been trying out spray paints so I'd document some product experiences. My main application is painting plastic. Nowadays, I paint ABS plastic, that has been 3d printed. Often, I do detail work with acrylic paint (the 2 fl oz tubes sold at craft stores) applied with a brush. Brushing paint directly onto 3d prints generally looks ugly and cheap. Three issues with that: (1) the filament lines are visually obvious and unwanted, (2) the brushed on paint is not opaque enough and the original plastic shows through, and (3) the paint does not stick to the plastic. Here are some suggestions and techniques for turning 3d prints into high quality looking items.

Smoothing
You probably already know that ABS can be dissolved by acetone, which you can brush on, or even use to glue ABS parts together. But if you want a no-hassle way to smooth plastic, you need a large glass jar like this one:

You also need a burlap 'wick' as shown in the photo. The jar needs only be filled with a small amount of acetone, just enough to soak the edges of the burlap and allow the acetone to climb up the material. If you leave it for a bit, then open the jar and put in your hand, you'll feel the warm, wet mist of acetone that ends above the burlap line.

Grab a sacrificial platform (some suggestions: old heatsinks, blocks of wood) and place your part on it inside the jar. Note, try to keep the part as low as possible. It is common for the top of a piece to not get smoothed nearly as well as the bottom.

Timing: remove the part every so often and let it breathe (for example 30 minutes in, then at least 10 minutes out). That timing will depend on your part. The ABS will be sticky at the surface so pick it up by the platform. The acetone will get into the whole part, so structurally the part will be bendy, and may sag due to gravity. Also, thin walls will sometimes dissolve, especially near small filament gaps due to poor 3d print quality. By placing the part in the jar only in short intervals with breathing time in between, you help keep the piece from collapsing on itself or developing holes in the outer walls while you are trying to smooth it. I'd suggest trying more outer shells in your print settings to avoid thin walls dissolving.

Priming
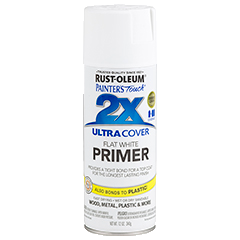
You need a primer if you are going to brush on most paints, especially the acrylic 2 fl oz craft store paints. There are a lot of products out there. Here's one I've been using (just finished my first can of it):


Rustoleum Painter's Touch Ultra Cover 2x Flat White Primer

This gives the 3d printed parts a matte, 'unglazed ceramics' type look.

If you just want one flat color, and you want to save time, there are lots of "paint+primer" products available that will do just fine.

Painting
With brushed on acrylics, multiple thin coats are the way to go. The first coat won't be completely opaque. Most of these regular styles of paint will have a rough enough dried surface to allow painting on top of them. However, some formulations, especially specialty glossy/metallic/other types, will end up creating a very smooth dried finish and you won't be able to get other paints to stick on top. Test first if the part you are painting is important.

Undo-ing your work
If you hate the paint job, it may be possible to chip off the paint and primer without damaging the plastic surface. Some paints will peel away off the primer, others will chip off with the primer and a little force. You can use a needle to get into the small areas, but in creases the paint will be impossible to get out. Soaking in water can help loosen the paint. After the part is fully dried you can start again.

Finishing
You should apply a protective coat after the piece is fully dried. The primer and paint tends to chip off quite easily otherwise. One of my favorite finishes is this one:


Krylon Triple-Thick Crystal Clear Glaze

This finish results in a glass/glazed ceramics like look. It's also fairly durable. Be careful when spraying, because it is VERY STICKY. If your part accidentally falls over or brushes against something, you're basically out of luck... I had a part fall over onto the Styrofoam plate it was sitting on, and the Styrofoam dissolved and little bits of it were stuck firmly all over the part. I ended up quickly soaking and then scraping all the paint and starting from scratch.

Another suggestion
I just found some PlastiKote Metal Flake (in blue) in storage at the hackerspace and tried it out. It is beautiful. I don't have any photos of my stuff just yet, but here is an example from someone else:

PlastiKote Metal Flake Blue Example

It works fine on the primed ABS plastic (haven't tried it on bare plastic) and makes the piece immediately look like glossy glazed ceramics.

As I try more stuff, I'll post more in this series. After the holidays you will be able to see photos of all the finished pieces.


Monday, December 15, 2014

First set of MOARbots


The first set of MOARbots are coming together. Pictured above are the 4 cart bodies in this set. I will be assembling them before I leave for the holidays, so that Sector 67 can bring them to Saturday Science. They won't be doing anything fancy; the game is human-controlled bumper cars. The setup:

  • 4 USB game controllers
  • 1 transmitter wixel
  • 1 receiver wixel per robot
  • 6 or so red LED 'damage' indicators per robot
  • Some limit switches and wire bumpers
  • A modular set of acrylic arena walls, hinged with duct tape, and with holes for snapping the supports into it (to keep the robots from ramming down the wall)
The game works as follows: Control (joystick) data gets sent out from each controller to each robot (if the controllers don't switch USB slots, it ought to be possible to color code the controllers to the corresponding robots). Each robot starts with full health, so no damage indicators are on. Each time the rear bumper gets hit (note the rear is the side with the marble) all the LEDs flash and the robot is in "invulnerable" mode. After "invulnerable" mode the LEDs light up to reflect how much total damage the robot has suffered since the round started. If all the LEDs light up, the robot enters a slow blink mode and stops moving, regardless of controller input. The supervisor (the person sitting at the computer that ties this all together) can hit a key at the Python script to reset the game. This sends a reset signal to all robots, who reset their damage indicators and start anew.

This game was designed specifically to allow one way communication only (controller computer to robots only), and to not involve the webcam.

Upcoming posts are expected to be MOARbots and holiday season related. Happy Hannukah and so on.


Tuesday, December 9, 2014

Chocolate Mold Round 1

I finally did my first silicone pour. The first run I messed up by reading off the wrong set of instructions and mixing with the wrong ratio as a result. The second one worked, with only minor issues. These results are far from beautiful because in my rush to put out a few 'prototypes' I decided to try microwaving chocolate instead of double boiling. The microwaved chocolate was unevenly heated and ended up being hard to work with. Next time will look much better!


Things I have learned:
  • The cured product seems very good--surprisingly durable and flexible.
  • The process of pouring takes some finesse, but I'll post about that after the next few pours.
  • The texture of the wood ultimately did transfer onto the silicone, but those fine details got lost on the chocolate step.
  • The process of melting and pouring chocolate is not easy either. Each product behaves slightly differently as well. Though 'supported' on the package, microwaving is not a good method.
  • A lot of the crappy candy melt stuff I bought tastes like crap. Big surprise. Pretty but disgusting in flavor. Good for practice I suppose.
  • I designed this bar to be 3/8" thick in the body and 1/8" thick on the details (the raised scales). That's a pretty thick chocolate bar. I tried pouring one with a much thinner body but it cracked in the removal process.
  • Ideally, I will find a way to melt the chocolate until it reaches as low a viscosity as possible. That will make the process faster and easier, and also make the chocolates a lot nicer looking.
I ordered a block of HDPE to mill my next positives. That will get rid of the wood grain issue. There should be enough material there to mill about 6 different positive blocks, so in addition to remaking this one, I will try a few more designs.

I will also give these a try with colored ice, to make 'stained glass' type window panes to put outside this winter. One advantage of Wisconsin is it is a great environment for ice and snow art. The weather will stay well below freezing for months at a time.

Happy holiday making!