Showing posts with label painting. Show all posts
Showing posts with label painting. Show all posts
Friday, March 17, 2017
Painting Robot Compilation
A while back somebody donated an old robot arm kit to Sector67. I built a small model of it with glue, tape, foamboard, and potentiometers, and hooked it up to an Arduino. The project is very simple, but it has been very popular at science fairs (and has survived many hours of use requiring minimal fixes only). Here's a compilation video.

Tuesday, September 27, 2016
Robot arm painting
Here's the robot arm at a university run back to school party in the library. The wrist was broken so I just tore it off and put a paintbrush. As usual, I left this for the 30 minutes before the party and the first 30 minutes of the party. No time for fine-tuning settings (counterweight, easel position, angle limits, etc) but it worked alright.
I've done a few of these robot painting things at science fairs. Since this one was for college age students and up, I felt safe handing the controls over. At kids science fairs I can't trust them not to poke out a few eyes, so it can be difficult to get any documentation of the event since I'm always busy with the controller.
Wednesday, March 30, 2016
Patinas and metallic paints
I've been experimenting with metallic paints on 3d printed objects and spray on patinas. Photos and then a description of technique and products below.


- Sand surfaces with 220 grit if smooth. Surface that are too smooth will be hard, though not impossible, to paint thinly.
- Brush a layer on as thinly as possibly. The print surface will show through. It will dry fairly quickly. If you can see brush strokes while the paint is wet, that is too thick (unless you like that look). Once dry, if you want to get rid of a brush stroke or drip you'll have to sand it down.
- Once dry, apply another layer. The deposited metal particles will roughen the surface so that subsequent layers of paint adhere better and get more coverage.
- The brass paint got brighter as it dried. It sometimes had a dull look when wet but that goes away.
- The patinas must be applied when the paint is wet to stand a chance of interacting with the metal particles, so apply a final thin wet coat and patina immediately. If too thick, the paint has a tendency to crumble up (cottage cheese is another description I've heard). Some patinas will also just deposit some color on the surface and so would be at least partially effective even on a dry coat of paint.
The patinas I used were the following products from Sculpt Nouveau:
- Tiffany Green
- Jade Green
- Deep Brown
- Mahogany
- Vista Rust (Bender head only)
I mixed and matched the for different effects on the different objects above. The Jade Green leaves obvious green deposits immediately on the surface.
Monday, December 29, 2014
More 3D Printed Gifts

Files from left to right:
- Customizable Star Container: http://www.thingiverse.com/thing:582449
- Tree Frog: http://www.thingiverse.com/thing:18479
- 3D knot: http://www.thingiverse.com/thing:5506
- Minion: http://www.thingiverse.com/thing:179106
- Trefoil Knot: http://www.thingiverse.com/thing:387146/
All were smoothed and spray or hand painted. The star had paper decoupage. The paper fins were laser cut from the wrong projection but that worked as a reasonable enough approximation. I'm still trying to figure out which the proper projection would be exactly.

Tree frog, looking really glossy!

Gyroid, file available here: http://www.thingiverse.com/thing:589489
Read more here: http://en.wikipedia.org/wiki/Gyroid

Star Vase

Sunday, December 28, 2014
Low-Poly Pokemon
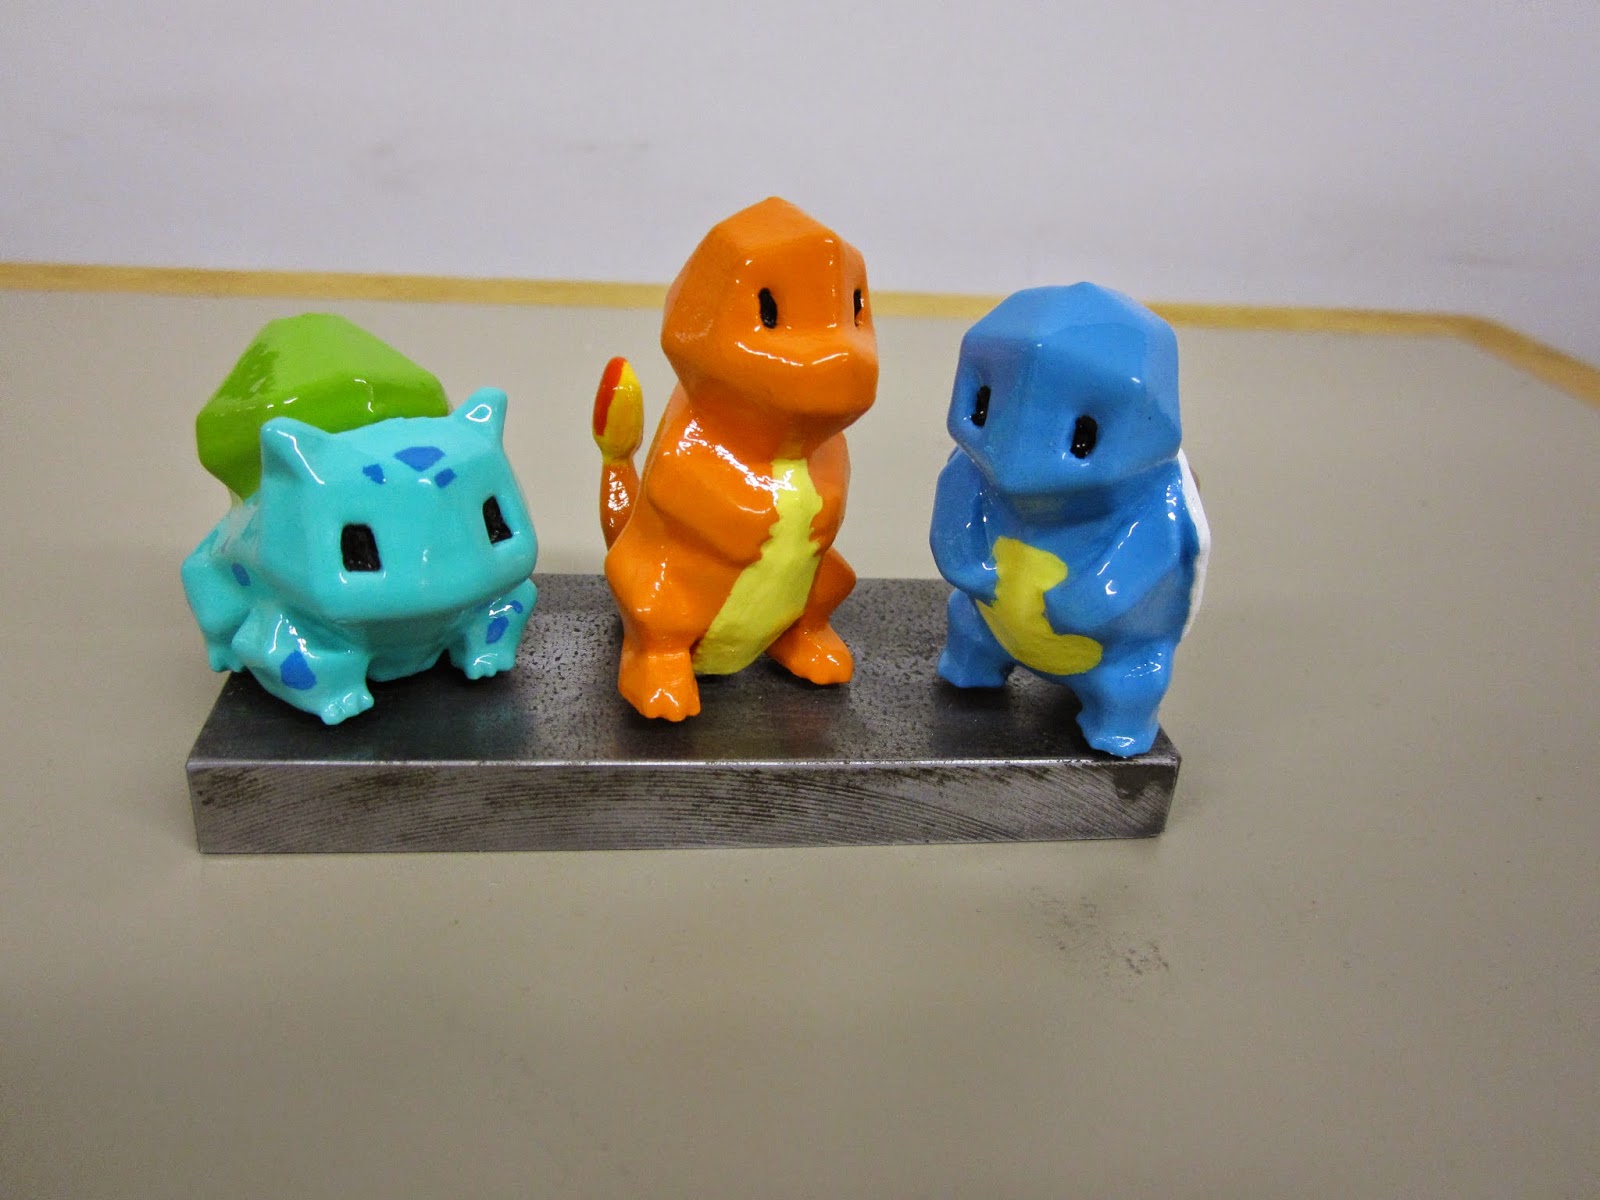

I 3d printed these for my sister. The designs are by FLOWALISTIK through Thingiverse.
- Bulbasaur: http://www.thingiverse.com/thing:327753
- Charmander: http://www.thingiverse.com/thing:323038
- Squirtle: http://www.thingiverse.com/thing:319413
After printing, they were smoothed in an acetone vapor bath. Then primed with flat white primer, then hand painted with acrylics. Finally, glossed with Triple Thick Clear Glaze spray.
I put magnets on the bottom and found a piece of steel to serve as a base.
Wednesday, December 17, 2014
Painting Suggestions #1
I've been trying out spray paints so I'd document some product experiences. My main application is painting plastic. Nowadays, I paint ABS plastic, that has been 3d printed. Often, I do detail work with acrylic paint (the 2 fl oz tubes sold at craft stores) applied with a brush. Brushing paint directly onto 3d prints generally looks ugly and cheap. Three issues with that: (1) the filament lines are visually obvious and unwanted, (2) the brushed on paint is not opaque enough and the original plastic shows through, and (3) the paint does not stick to the plastic. Here are some suggestions and techniques for turning 3d prints into high quality looking items.
Smoothing
You probably already know that ABS can be dissolved by acetone, which you can brush on, or even use to glue ABS parts together. But if you want a no-hassle way to smooth plastic, you need a large glass jar like this one:

You also need a burlap 'wick' as shown in the photo. The jar needs only be filled with a small amount of acetone, just enough to soak the edges of the burlap and allow the acetone to climb up the material. If you leave it for a bit, then open the jar and put in your hand, you'll feel the warm, wet mist of acetone that ends above the burlap line.
Grab a sacrificial platform (some suggestions: old heatsinks, blocks of wood) and place your part on it inside the jar. Note, try to keep the part as low as possible. It is common for the top of a piece to not get smoothed nearly as well as the bottom.
Timing: remove the part every so often and let it breathe (for example 30 minutes in, then at least 10 minutes out). That timing will depend on your part. The ABS will be sticky at the surface so pick it up by the platform. The acetone will get into the whole part, so structurally the part will be bendy, and may sag due to gravity. Also, thin walls will sometimes dissolve, especially near small filament gaps due to poor 3d print quality. By placing the part in the jar only in short intervals with breathing time in between, you help keep the piece from collapsing on itself or developing holes in the outer walls while you are trying to smooth it. I'd suggest trying more outer shells in your print settings to avoid thin walls dissolving.
Priming
You need a primer if you are going to brush on most paints, especially the acrylic 2 fl oz craft store paints. There are a lot of products out there. Here's one I've been using (just finished my first can of it):
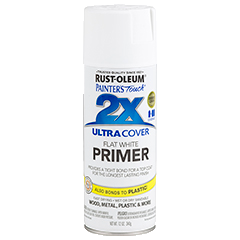
Rustoleum Painter's Touch Ultra Cover 2x Flat White Primer
This gives the 3d printed parts a matte, 'unglazed ceramics' type look.
If you just want one flat color, and you want to save time, there are lots of "paint+primer" products available that will do just fine.
Painting
With brushed on acrylics, multiple thin coats are the way to go. The first coat won't be completely opaque. Most of these regular styles of paint will have a rough enough dried surface to allow painting on top of them. However, some formulations, especially specialty glossy/metallic/other types, will end up creating a very smooth dried finish and you won't be able to get other paints to stick on top. Test first if the part you are painting is important.
Undo-ing your work
If you hate the paint job, it may be possible to chip off the paint and primer without damaging the plastic surface. Some paints will peel away off the primer, others will chip off with the primer and a little force. You can use a needle to get into the small areas, but in creases the paint will be impossible to get out. Soaking in water can help loosen the paint. After the part is fully dried you can start again.
Finishing
You should apply a protective coat after the piece is fully dried. The primer and paint tends to chip off quite easily otherwise. One of my favorite finishes is this one:

Krylon Triple-Thick Crystal Clear Glaze
This finish results in a glass/glazed ceramics like look. It's also fairly durable. Be careful when spraying, because it is VERY STICKY. If your part accidentally falls over or brushes against something, you're basically out of luck... I had a part fall over onto the Styrofoam plate it was sitting on, and the Styrofoam dissolved and little bits of it were stuck firmly all over the part. I ended up quickly soaking and then scraping all the paint and starting from scratch.
Another suggestion
I just found some PlastiKote Metal Flake (in blue) in storage at the hackerspace and tried it out. It is beautiful. I don't have any photos of my stuff just yet, but here is an example from someone else:
PlastiKote Metal Flake Blue Example
It works fine on the primed ABS plastic (haven't tried it on bare plastic) and makes the piece immediately look like glossy glazed ceramics.
As I try more stuff, I'll post more in this series. After the holidays you will be able to see photos of all the finished pieces.
Smoothing
You probably already know that ABS can be dissolved by acetone, which you can brush on, or even use to glue ABS parts together. But if you want a no-hassle way to smooth plastic, you need a large glass jar like this one:
You also need a burlap 'wick' as shown in the photo. The jar needs only be filled with a small amount of acetone, just enough to soak the edges of the burlap and allow the acetone to climb up the material. If you leave it for a bit, then open the jar and put in your hand, you'll feel the warm, wet mist of acetone that ends above the burlap line.
Grab a sacrificial platform (some suggestions: old heatsinks, blocks of wood) and place your part on it inside the jar. Note, try to keep the part as low as possible. It is common for the top of a piece to not get smoothed nearly as well as the bottom.
Timing: remove the part every so often and let it breathe (for example 30 minutes in, then at least 10 minutes out). That timing will depend on your part. The ABS will be sticky at the surface so pick it up by the platform. The acetone will get into the whole part, so structurally the part will be bendy, and may sag due to gravity. Also, thin walls will sometimes dissolve, especially near small filament gaps due to poor 3d print quality. By placing the part in the jar only in short intervals with breathing time in between, you help keep the piece from collapsing on itself or developing holes in the outer walls while you are trying to smooth it. I'd suggest trying more outer shells in your print settings to avoid thin walls dissolving.
Priming
You need a primer if you are going to brush on most paints, especially the acrylic 2 fl oz craft store paints. There are a lot of products out there. Here's one I've been using (just finished my first can of it):
Rustoleum Painter's Touch Ultra Cover 2x Flat White Primer
This gives the 3d printed parts a matte, 'unglazed ceramics' type look.
If you just want one flat color, and you want to save time, there are lots of "paint+primer" products available that will do just fine.
Painting
With brushed on acrylics, multiple thin coats are the way to go. The first coat won't be completely opaque. Most of these regular styles of paint will have a rough enough dried surface to allow painting on top of them. However, some formulations, especially specialty glossy/metallic/other types, will end up creating a very smooth dried finish and you won't be able to get other paints to stick on top. Test first if the part you are painting is important.
Undo-ing your work
If you hate the paint job, it may be possible to chip off the paint and primer without damaging the plastic surface. Some paints will peel away off the primer, others will chip off with the primer and a little force. You can use a needle to get into the small areas, but in creases the paint will be impossible to get out. Soaking in water can help loosen the paint. After the part is fully dried you can start again.
Finishing
You should apply a protective coat after the piece is fully dried. The primer and paint tends to chip off quite easily otherwise. One of my favorite finishes is this one:
Krylon Triple-Thick Crystal Clear Glaze
This finish results in a glass/glazed ceramics like look. It's also fairly durable. Be careful when spraying, because it is VERY STICKY. If your part accidentally falls over or brushes against something, you're basically out of luck... I had a part fall over onto the Styrofoam plate it was sitting on, and the Styrofoam dissolved and little bits of it were stuck firmly all over the part. I ended up quickly soaking and then scraping all the paint and starting from scratch.
Another suggestion
I just found some PlastiKote Metal Flake (in blue) in storage at the hackerspace and tried it out. It is beautiful. I don't have any photos of my stuff just yet, but here is an example from someone else:
PlastiKote Metal Flake Blue Example

It works fine on the primed ABS plastic (haven't tried it on bare plastic) and makes the piece immediately look like glossy glazed ceramics.
As I try more stuff, I'll post more in this series. After the holidays you will be able to see photos of all the finished pieces.
Monday, December 9, 2013
Laser Cut Hannukah Gifts (& update to the painting)


The laser cut holiday gift posts begin! On the left: My Neighbor Totoro cubby for my sister. On the right: a paper-on-plywood piece based on traditional Japanese woodblock prints. I like the technique and will probably experiment with a few more similar pieces, or the same piece with new patterns.

Above: the painting is soooo close to being done. Once it is finished I'll collect all the work-in-progress photos and post them side by side.
Tuesday, August 3, 2010
Painting Still Not Finished
This painting is starting to drive me crazy. Still, I promise I will finish it. Otherwise I'll never get that floorspace back in my workshop...

Work will have to stop for a while (vacation, school starting) after this week.

Work will have to stop for a while (vacation, school starting) after this week.
Thursday, July 1, 2010
Summer Update
A pretty empty update for now...most of my projects are crawling along as a lot of my time is sucked up by my writing class, my summer research, my efforts to learn Japanese before my trip to Japan in August, and my terrible afternoon-nap-habit (I blame the heat...it makes me drowsier than usual).
One thing I did start doing again this week is cooking (after weeks of eating out or eating PB&J sandwiches). Earlier this week I made pasta primavera (with fried red & yellow bell peppers, fried yellow & green squash, and red, yellow, and orange tomatoes to garnish it) and also tomato-cilantro soup (tomato-basil recipe with a substitution). I like cooking, so next week I am going to try my hand at a chicken-liver paté.
I've also been decorating and cleaning my new place. Allen left his plants with me so I could babysit them over the summer, and I don't really want to give them back, though I do want to put them in nicer planters. This is a glass of green tea with fresh mint from my garden.

The coaster is a mosaic I made at the Getty Villa. I couldn't pass up a chance to do some arts & crafts, even though everybody else at the table was under the age of 12. If you can't tell, I tried to depict a stylized skull, since I had just seen the Aztec Pantheon exhibit. It's an exhibit worth seeing unless you have already visited/plan to visit the Museo Nacional de Antropología in Mexico City (that's where all the pieces came from). If you're into blood and gore then you can get a kick of of the sacrificial stone, sacrificial knives, and sacrificial stone eagle with a hole in the back for burning the hearts of the sacrifices.

After mosaic-ing I remembered my plan to make a large mosaic to cover a portion of the wall of my parents' courtyard. I scouted out a tile store and will be preparing some photoshop mockups in the coming months.
I mistakenly bought some plaster of paris before realizing that mosaics require a different sort of adhesive and also grout. Since I don't feel like returning it Asher will most likely be enjoying a homemade birthday piñata (inflated balloons are coated in plaster of paris to make the body of the piñata) and eventually I will have to try my hand at sculpture.
Coming soon:
Finally here is another shot of the painting, coming along very slowly.

One thing I did start doing again this week is cooking (after weeks of eating out or eating PB&J sandwiches). Earlier this week I made pasta primavera (with fried red & yellow bell peppers, fried yellow & green squash, and red, yellow, and orange tomatoes to garnish it) and also tomato-cilantro soup (tomato-basil recipe with a substitution). I like cooking, so next week I am going to try my hand at a chicken-liver paté.
I've also been decorating and cleaning my new place. Allen left his plants with me so I could babysit them over the summer, and I don't really want to give them back, though I do want to put them in nicer planters. This is a glass of green tea with fresh mint from my garden.

The coaster is a mosaic I made at the Getty Villa. I couldn't pass up a chance to do some arts & crafts, even though everybody else at the table was under the age of 12. If you can't tell, I tried to depict a stylized skull, since I had just seen the Aztec Pantheon exhibit. It's an exhibit worth seeing unless you have already visited/plan to visit the Museo Nacional de Antropología in Mexico City (that's where all the pieces came from). If you're into blood and gore then you can get a kick of of the sacrificial stone, sacrificial knives, and sacrificial stone eagle with a hole in the back for burning the hearts of the sacrifices.

After mosaic-ing I remembered my plan to make a large mosaic to cover a portion of the wall of my parents' courtyard. I scouted out a tile store and will be preparing some photoshop mockups in the coming months.
I mistakenly bought some plaster of paris before realizing that mosaics require a different sort of adhesive and also grout. Since I don't feel like returning it Asher will most likely be enjoying a homemade birthday piñata (inflated balloons are coated in plaster of paris to make the body of the piñata) and eventually I will have to try my hand at sculpture.
Coming soon:
- My FM transmitter works, but is waiting on me to order a 7 segment display and level-shifters so I can run it off the car's outlet.
- When I get a camera I can show off my newly decorated home
- I got hit by the LED art bug again and am designing tiny lamps (but so far I've been coming up with the wrong pairings of batteries/bulbs and nothing lasts as long as it ought to)
- When school starts up again and I can gain access to the School of Architecture's laser cutter, I will attempt to learn some basic AutoCad so I can make the Settlers of Catan plywood board
Finally here is another shot of the painting, coming along very slowly.

Tuesday, June 15, 2010
Painting's Progress
First, I gridded the 36 " x 48 " canvas into 0.9" squares...

I paint in sessions of about 2-4 hours each. As awesome as my workshop is, it is not an art studio and I am have to paint on the floor (not to comfortable). Here is the painting right at the beginning:

Here is the painting as of last week:

Here is the painting as of today. I've probably spent at least twenty hours so far on it. I don't want to even think about how long it might take me to cover the whole canvas. I just hope I get it done before school starts again.


I paint in sessions of about 2-4 hours each. As awesome as my workshop is, it is not an art studio and I am have to paint on the floor (not to comfortable). Here is the painting right at the beginning:

Here is the painting as of last week:

Here is the painting as of today. I've probably spent at least twenty hours so far on it. I don't want to even think about how long it might take me to cover the whole canvas. I just hope I get it done before school starts again.

Subscribe to:
Posts (Atom)