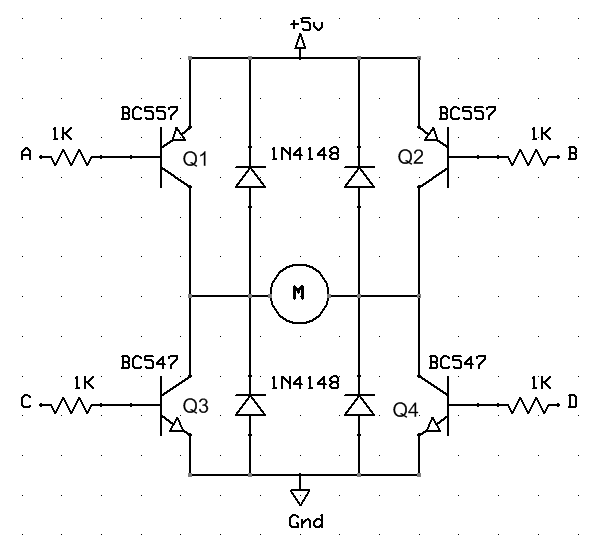
If you are a n00b like I was back in freshman year, or just forgetful (like I am now) you might want to take note before you burn out a bunch of transistors.
At some point you may realize you only need 2 inputs to control your h-bridge. You will tie the left hand inputs (base of Q1,Q3) together, and the right hand inputs (base of Q2, Q4) together.
Likely, burning transistors will at some point result, because the inputs will be left floating. For me, I accidentally pulled out the input wires.
"The important thing is you cannot leave any of the terminals AC and BD float. Let’s look at the AC terminal in more detail. Since A and C are tied together, and if it is left float then there will be a path for current through the collector of Q1, through its base, through the base of Q3, through its emitter to the ground. So, Q1 and Q3 are on resulting a short circuit. So, you must be careful if you are thinking about reducing the control pins by tying A with C and B with D. You just can’t leave the tied terminals open or float. They should be either grounded or pulled high."
Read more here:
DC Motor Interfacing to PIC Micro. Scroll down to the "Important Note."